
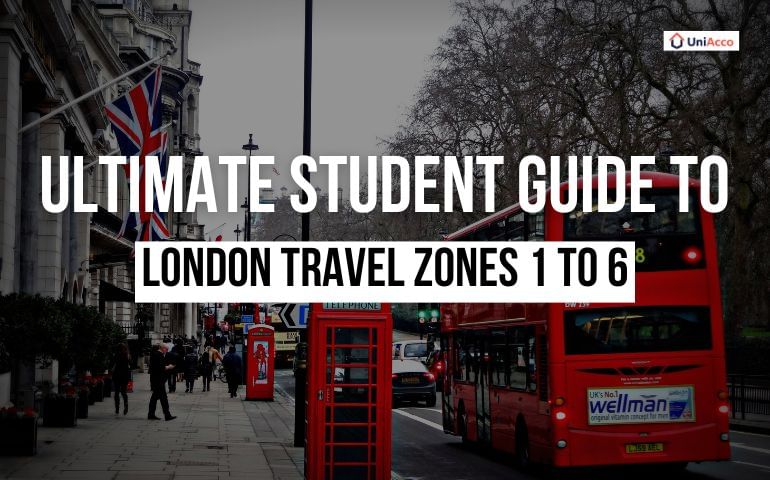
With your plans set to study in London, brace yourself to explore a city that’s as historic as it is fast-paced. But before you hop on the Tube or catch a bus to your uni or local café, there’s one thing you’ll want to master first: London’s travel zones.
The city’s public transport network is split into numbered zones, with Zone 1 covering central London and Zone 6 stretching to the outer suburbs. These zones not only affect how you travel, but also what you pay, making them especially important for budgeting as an international student.
This guide breaks down London Travel Zones 1 to 6 in a way that’s simple, practical, and tailored to your student life. From key routes and travel cards to zone-specific highlights and money-saving tips, everything you need to move around like a local is right here.
London Travel Zones 1-6: An Overview
London’s public transport system is divided into fare zones that stretch out in rings from the city centre. Zones 1 to 6 are the ones most students will travel across for university, part-time work, or just soaking up the city’s vibe. Each zone offers a different slice of London life, from buzzing landmarks to laid-back suburbs.
| Zone | What It Covers |
| Zone 1: Central London | The heart of the city, home to Big Ben, Oxford Street, and bustling Tube stations. |
| Zone 2: Inner City Neighbourhoods | Directly surrounds Zone 1, with a blend of student housing, cafes, and cool local spots. |
| Zone 3: Outer City Living | More residential, quieter, and often more affordable for student accommodation. |
| Zone 4: Suburban Stretch | Primarily suburban areas with high streets, parks, and a slower pace of life. |
| Zone 5: Further Out Suburbs | Greater distance from central London, but often with good transport links and lower rent. |
| Zone 6: Green & Spacious | The edge of London proper — more greenery, commuter towns, and a calmer atmosphere. |
Understanding Each London Zone
Zone 1: London City Centre
Zone 1 is the heartbeat of London, where history meets hustle, and iconic sights sit around every corner. If you’re studying or staying near here, you’ll be living at the centre of it all, both literally and culturally.
Key Neighbourhoods in Zone 1
Zone 1 covers some of London’s most sought-after postcodes. You’ll find the buzzing West End, stylish Kensington, and business-heavy City of London here. Other well-known areas include Holborn, Paddington, Old Street, Angel, Waterloo, Euston, London Bridge, and Elephant & Castle. It’s also home to transport-heavy spots like Vauxhall, Edgware Road, and Marylebone, ideal for quick commutes.
Must-See Attractions in Zone 1
Living or studying in Zone 1 means you’re never far from a landmark. Some of the UK’s most recognisable attractions are here:
- Buckingham Palace and the Houses of Parliament for a royal brush-up
- British Museum, Tate Modern, and National Gallery for art and culture
- Borough Market for an affordable foodie fix
- Covent Garden for shopping and street shows
- South Bank for riverside walks and Insta-worthy views
- London Eye for a bird’s-eye view of the city
Tube Coverage in Zone 1
Every Underground line runs through Zone 1, which means you can get almost anywhere in central London with one quick hop. Stations are densely packed, with some just minutes apart. For instance, Leicester Square to Covent Garden is barely a 3-minute walk! Whether you’re heading to class, catching a play, or grabbing a late-night bite, Zone 1’s transport makes it seamless.
Zone 2: Inner London
Zone 2 is where central London begins to mellow into neighbourhood charm. It’s ideal for students seeking quicker commutes without the high cost of Zone 1 rent. It’s like London’s trendy middle ground, still close to the action, but with a little more room to breathe.
Key Neighbourhoods in Zone 2
This zone stretches through parts of Islington, Tower Hamlets, Camden, Southwark, and Hackney, while brushing up against Greenwich, Hounslow, Wandsworth, Lewisham, and Kensington & Chelsea. Some of these areas spill over into Zone 3, but the Zone 2 portions are where you’ll find an ideal mix of student flats, local pubs, and neighbourhood cafes.
Must-See Attractions in Zone 2
Zone 2 is your gateway to London’s indie side, that’s less touristy and more authentic. Explore:
- Camden Market for vintage fashion, street eats, and live music
- Hampstead Heath for sweeping city views and peaceful green walks
- Portobello Road Market in Notting Hill for antiques and weekend vibes
- Greenwich with its Royal Observatory, Cutty Sark, and maritime history
- Upper Street in Islington for chic restaurants and boutique shopping
- Clapham Common and Brockwell Park for laid-back picnics and sports
Tube Coverage in Zone 2
Every Underground line except the Waterloo & City line makes a stop in Zone 2. This means you’re always well-connected, whether you’re heading to campus, catching a gig, or dashing off to Zone 1. With strong links and slightly lower fares, Zone 2 is a practical sweet spot for student living.
Zone 3: Outer City Living
Zone 3 is quieter, greener, and more affordable than Zones 1 and 2. Perfect for students seeking a balance between city life and peaceful evenings.
Key Neighbourhoods in Zone 3
Zone 3 stretches through parts of Newham, Ealing, Haringey, Waltham Forest, Lewisham, Barnet, Brent, and Merton, with a few fingers dipping into Hackney, Camden, and Croydon. Some neighbourhoods straddle the border with Zones 2 or 4, creating a sweet spot for flexible commuting.
Must-See Attractions in Zone 3
- Wembley Stadium for major concerts and sporting events
- Kew Gardens — a UNESCO World Heritage Site with exotic flora and peaceful landscapes
- Horniman Museum and Gardens in Forest Hill for quirky exhibits and killer views
- Epping Forest edges in here too, offering walking trails and biking routes
- Walthamstow Wetlands, a hidden gem for birdwatchers and Instagram shots
Tube Coverage in Zone 3
Zone 3 is served by a mix of lines: the Jubilee, Central, District, Piccadilly, Metropolitan, and London Overground. Stations here are well-connected and often less crowded than central ones, giving you a bit of breathing room during peak hours.
Zone 4: Suburban Stretch
Zone 4 marks the beginning of London’s outer layer with quieter streets, larger parks, and rents that won’t give you nightmares. For students who prefer space, it’s a strong contender.
Key Neighbourhoods in Zone 4
Zone 4 includes stretches of Greenwich, Hounslow, Barnet, Bromley, Redbridge, Harrow, Kingston upon Thames, and Sutton. You’ll also find parts of Ealing, Enfield, Newham, and Waltham Forest making their suburban debut here. Some of these overlap into Zone 3, while others push just outside London’s traditional boundary.
Must-See Attractions in Zone 4
- Hampton Court Palace — Henry VIII’s legendary residence with stunning riverside gardens
- Richmond Park — think deer herds, cycling paths, and royal parkland
- Crystal Palace Park — quirky dinosaur sculptures, maze, and sports centre
- Ilford’s Valentines Mansion — a slice of East London history in a tranquil setting
- Bexley’s Danson Park — lakeside walks and weekend festivals
Tube Coverage in Zone 4
You’re still well within reach of the city thanks to the District, Central, Piccadilly, Metropolitan, Jubilee, and London Overground lines. Trains may take a little longer, but they’re reliable and often less hectic.
Zone 5: Further Out Suburbs
London starts to feel more like its surrounding countryside with less noise, more space, and a slower rhythm of life from Zone 5. For students, it’s a chance to live affordably without being too far from the action.
Key Neighbourhoods in Zone 5
Zone 5 includes parts of Bexley, Bromley, Kingston, Enfield, Croydon, Hillingdon, Harrow, and Sutton, along with sections of Barnet, Redbridge, and Hounslow. Some of these areas dip into Zone 6, while others reach toward the edge of Greater London. Expect suburban streets, family homes, and parks in every direction.
Must-See Attractions in Zone 5
- Wimbledon — not just for tennis, but for its lovely village vibes and common
- Ruislip Lido — a hidden sandy beach with a woodland train ride (yes, really!)
- Osterley Park — a grand country estate set among quiet green stretches
- Hall Place and Gardens in Bexley — a Tudor mansion and riverside retreat
- Croydon’s Boxpark — a hotspot for foodies and gig-goers
Tube Coverage in Zone 5
Zone 5 is served by the Metropolitan, District, Central, Jubilee, and Piccadilly lines, with London Overground and some National Rail lines connecting the dots. Commutes are longer but quieter, and you’re rarely far from a green space.
Zone 6: Green & Spacious
Zone 6 is where city meets country. The air feels cleaner, the streets are wider, and you’ll often find real houses instead of flat shares. It’s great for students at campuses located in the outskirts, or those who prefer birdsong to bus horns.
Key Neighbourhoods in Zone 6
This zone covers stretches of Reigate and Banstead, Epsom and Ewell, Elmbridge, Three Rivers, Tandridge, Bromley, Havering, and Kingston. Some areas like Croydon, Enfield, and Hounslow also appear here. Many parts lie just outside the official boundary of Greater London, giving you a semi-rural feel with city connections.
Must-See Attractions in Zone 6
- Chessington World of Adventures — theme park thrills just outside the city
- Bushy Park — perfect for a Sunday picnic or study break stroll
- Kingston’s riverside — relaxed cafes and student-friendly pubs along the Thames
Tube Coverage in Zone 6
You have fair access to the Metropolitan, District, Piccadilly, Jubilee, and Central lines. The London Overground and various National Rail routes are also major lifelines, helping students stay connected to central campuses.
How Do London Travel Zones Work?
London’s public transport system is organised into concentric fare zones, ranging from Zone 1 in the city centre to Zone 9 on the outer edges. These zones form the basis for calculating travel fares across the Transport for London (TfL) network, which includes the London Underground (Tube), Overground, DLR, National Rail services, and buses.
The number of zones you travel through directly influences the cost of your journey. Travelling within a single zone is more cost-effective, while crossing multiple zones, especially during peak hours, results in higher fares. This structure makes it essential for students to be aware of which zone their university, accommodation, and frequent destinations fall into.
Here is a brief overview of the key zones:
| Zone | Description | Key Features |
| Zone 1 | Central London | Major landmarks, business districts, and key tourist attractions |
| Zone 2 | Inner Suburbs | Mix of residential areas, commercial centres, and entertainment hubs |
| Zone 3 | Outer Suburbs | Predominantly residential, more spacious housing, local amenities |
| Zone 4 | Extended Suburban Areas | Quiet neighbourhoods, blend of housing and parks, reliable transport connections |
| Zone 5 | Outer Residential London | More relaxed pace, affordable housing, balance of connectivity and quiet |
| Zone 6 | Outermost Edge of London | Suburban lifestyle near Greater London boundary, access to green spaces and regional transport links |
Essential Tips for Travelling Across London Zones
- Choose between Oyster Card and Contactless Payments
Both Oyster cards and contactless bank cards offer easy payment options for London transport. Oyster cards let you top up credit and tap in/out, while contactless payments use your debit or credit card directly. Both have the same fares and daily caps, but contactless is more convenient, as there is no need to carry or recharge a separate card. If you prefer cash top-ups or want more control, stick to Oyster.
- Make the Most of Daily and Weekly Fare Caps
London’s fare caps limit how much you pay each day or week, no matter how often you travel. If you commute regularly, a weekly cap can save you money. For occasional trips, daily caps ensure you won’t overpay. Understand your travel patterns to pick the right option and keep your transport budget on track.
- Avoid Peak Hours to Save on Fares
Peak travel times, including weekday mornings (6:30–9:30 AM) and evenings (4–7 PM), cost more due to higher demand. If your schedule allows, try to travel outside these hours. Off-peak journeys are cheaper and less crowded, making for a more pleasant commute or sightseeing experience.
Wrapping Up!
Understanding London Travel Zones 1 to 6 is essential for every international student to navigate the city efficiently and manage transportation costs wisely. Knowing which zones cover your university, student accommodation, and favourite spots helps you plan your daily commute and budget better. With this guide, you’re now equipped to travel smarter, save on fares, and enjoy everything London has to offer without hassle.
And, when it comes to finding the right place to live, choosing the perfect student accommodation in London is just as important. UniAcco offers a wide range of options close to your university and preferred travel zone, ensuring you settle in comfortably and start your journey on the right foot.
FAQs
1. What Are London Travel Zones?
London is divided into nine travel zones, with Zone 1 at the city centre and Zone 9 covering the outskirts. Zones 1 to 6 are the most relevant for students as most universities, student housing, and cultural hotspots fall within this range.
2: Which Zones Are Considered Central London?
Zones 1 and 2 make up Central London. Zone 1 covers iconic locations like Buckingham Palace, Westminster, and Oxford Street. Zone 2 surrounds this area and features residential neighbourhoods with great public transport links, offering more affordable living while keeping you close to the city buzz.
3: Does The Oyster Card Cover Zone 6 in London?
Yes, you can use your Oyster card or contactless payment in Zone 6. All National Rail, Underground, and bus services within zones 1 to 6 accept these payment methods, making it easy to commute even from the city’s outer areas.
4: Can I Travel Across Multiple Zones With One Ticket?
Absolutely. Whether you’re going from Zone 2 to Zone 5 or Zone 1 to Zone 6, you only need one ticket. The fare is calculated based on how many zones you pass through. Using an Oyster card or contactless card ensures a lower fare and automatic daily/weekly caps.


 LinkedIn


0 Comments